Review: SEACAM Silver housing for D500
My first Nikon camera, an FE2, had 11 controls in total. Of course, being a film camera meant that many of the controls that we now take for granted were simply not available. It is a truth that cameras have become more and more capable and complicated since digital technology replaced film. In turn, this has also led to a profusion of controls that are needed to access this extra functionality.
However, as Alex Mustard notes in his book “Underwater Photography Masterclass,” time is always limited to us when we are underwater, and especially so when taking pictures. Simplification and specialization are key to capturing beautiful images of scenes with rapidly changing light conditions or of skittish subjects.

The chatting to SEACAM’s owner, Harald Hordosch, he gives a clear insight into how he applies his philosophy when designing housings. He feels strongly that clean, elegant, precise designs provide an intuitive platform for enhancing a photographer’s creativity and that photographers caught up in a myriad of technicalities are unlikely to be able to also concentrate on the creative process.
This approach is reflected particularly strongly in the SEACAM Silver range. Wetpixel has been using and reviewing the SEACAM Silver D500 housing for the past few months. This review focuses on the reviewer’s impressions of the housing.
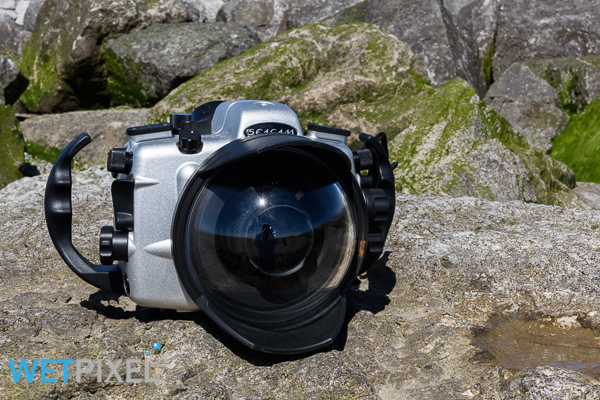
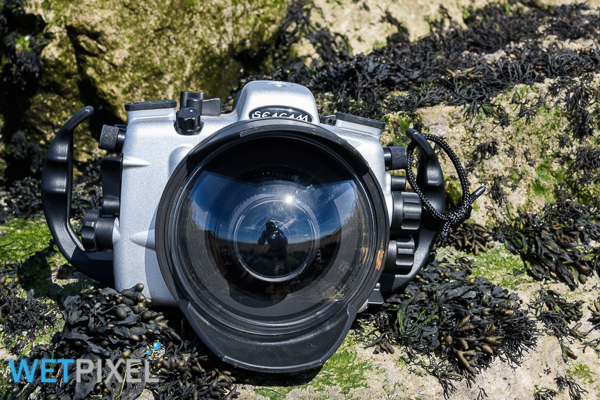
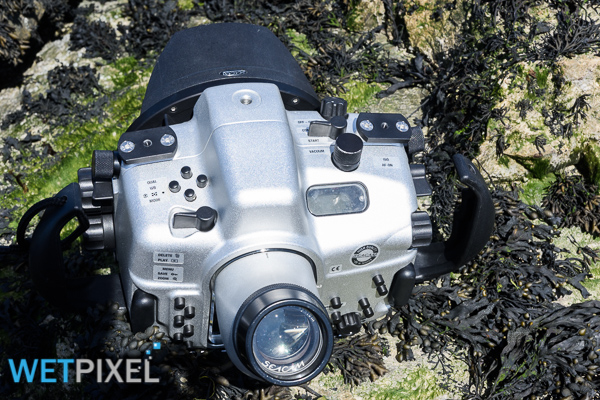
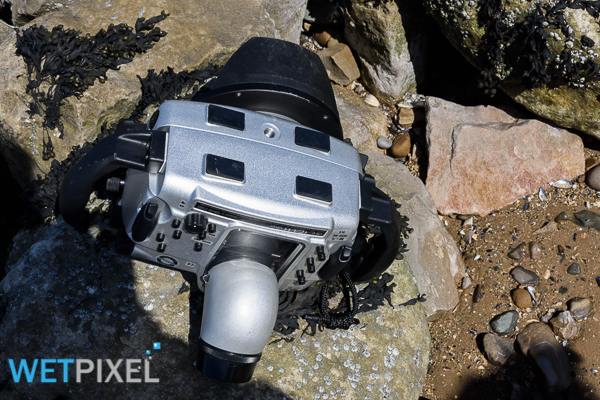
Many of the images feature SEACAM’s Compact Dome (CP) port and S45 viewfinder.
SEACAM Silver D500 Housing
All SEACAM housings are milled from a block of aluminum alloy and feature a “mechanically densified” outer surface that gives the housings their unique silver appearance whilst also providing a salt water resistant surface that SEACAM claim is tougher than anodizing or hard coating. The interior of the housing is lined with a black velvet-like fabric, which cushions cameras and lenses while also helping to soak up any small amounts of moisture or condensation that may inadvertently end up within it.
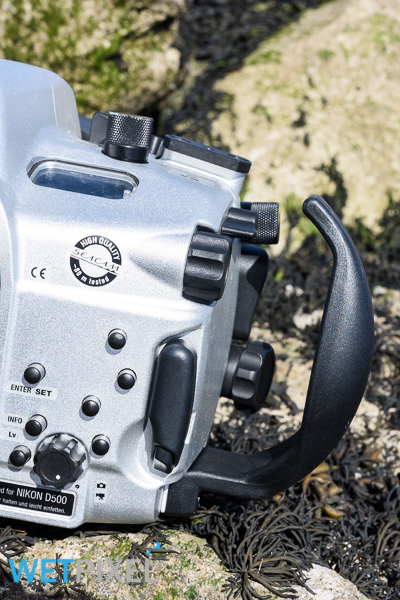
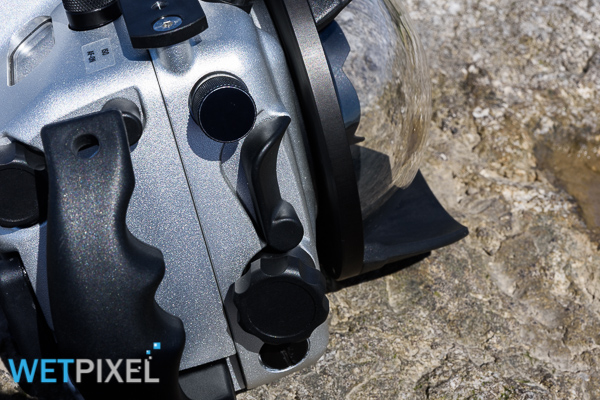
The housing closed with two “Safety Locks” constructed from titanium. Strobes and arms are attached via two black 25mm T plates on the housing body.
The port attachment system has a full 360° threaded twist with a bayonet style alignment stop that ensures any port shades are correctly oriented. There is no port lock.
This removes one control button from the housing and this is a theme that is consistent throughout its design. Typically, where levers have been used, most act in both directions (up and down or forward and backwards). This allows one lever to control two functions.
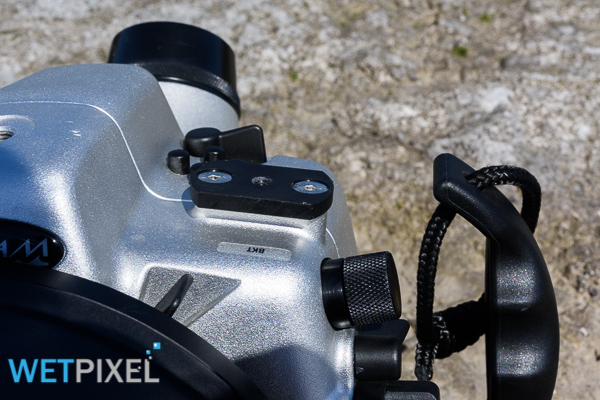
Saying that, there is a lever on the front left that accesses (only) the camera’s bracketing mode.
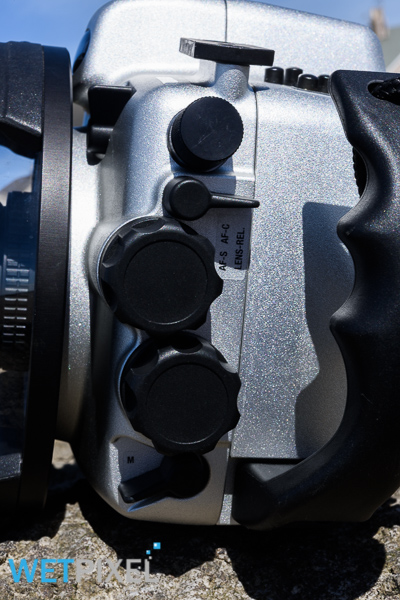
Continuing with the housing’s left hand side, there are 4 controls below an M14 port (which in my case was equipped with an S6 strobe bulkhead). From the top, these are: A lever that selects focus area and mode (down) and releases the lens (up). The next two dials allow the use of both zoom and manual focus rings on lenses with both, and the bottom lever allows the selection of either auto or manual focus.
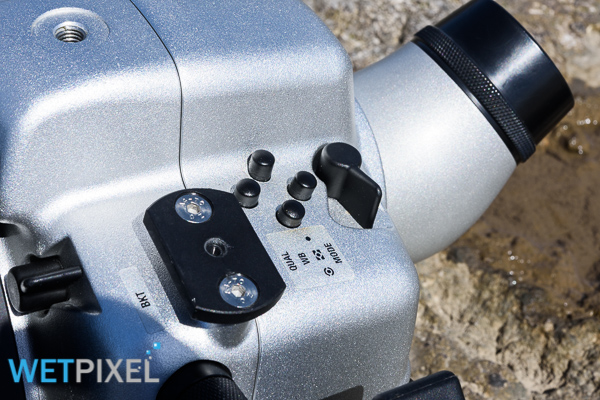
Above and slightly behind these, are a series of push buttons that access image quality, mode, white balance and metering options. Behind this is a lever that accesses playback (forward) and image delete (backwards).
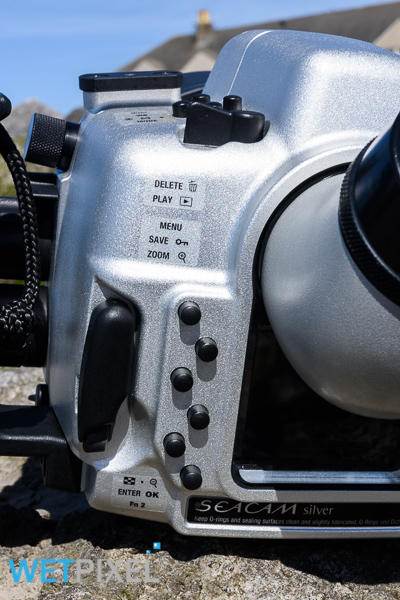
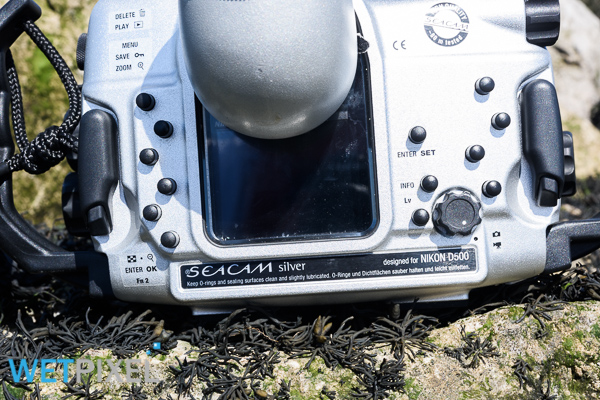
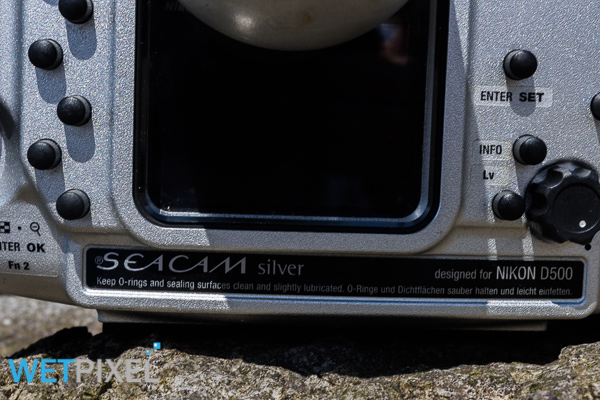
Moving on to the rear of the housing, there is a vertical line of 5 buttons on the left hand side. These give access to menu, save, zoom in, zoom out/flash settings, OK and Fn 2 buttons. Currently, the Fn 2 button is of little practical use for underwater image makers but future camera firmware updates may address this.
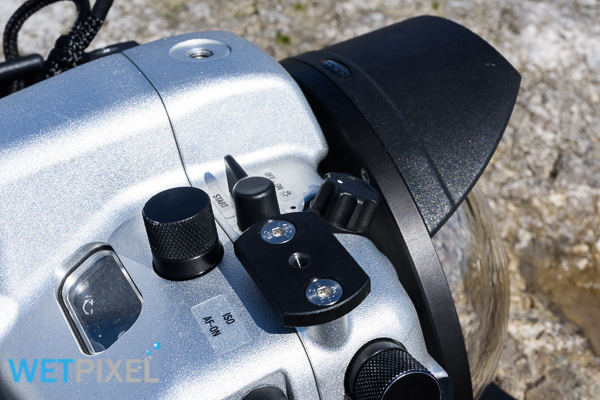
The housing has a window that allows a 70 mm (2.8”) by 45 mm (1.8”) view of the camera’s LCD monitor. There is also a port that allows for any of SEACAM’s magnifying or standard viewfinders to be attached.
To the right of the LCD window are a series of controls. SEACAM do not attempt to replicate the camera’s multi selector but utilize 5 buttons giving up, down, left, right and select options. Below these are a further 2 buttons that access the info screen and live view. Lastly, there is a dial that controls the live view selector’s still or video modes.
On the top left, there is a further tilted window that provides a view of the control panel display.
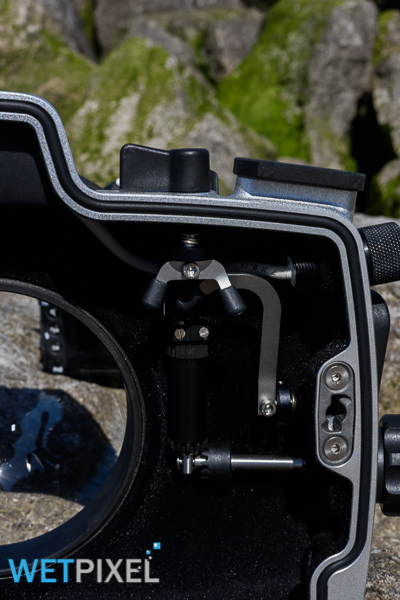
Further forward, there is a lever that gives access to exposure compensation (push forward) or record (pull back). There is also a rotating dial allowing the camera to be switched on or off.
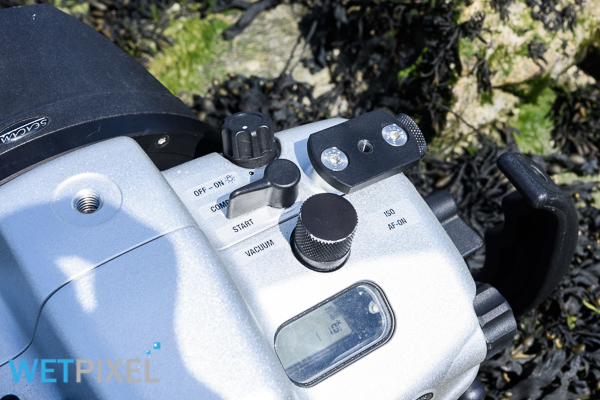
A new feature is another M14 port that is labelled for use with a vacuum system that is located in front of the display window.
On the right hand side, there are rotating dials for main and sub command dials, along with a shaped lever for the shutter release.

The only other control is a lever that activates rear button autofocus (down) and ISO settings (up). At the top is an M14 port (with an S6 bulkhead in my case). Lastly, there is a further M14 accessory port at the bottom of the right hand side.
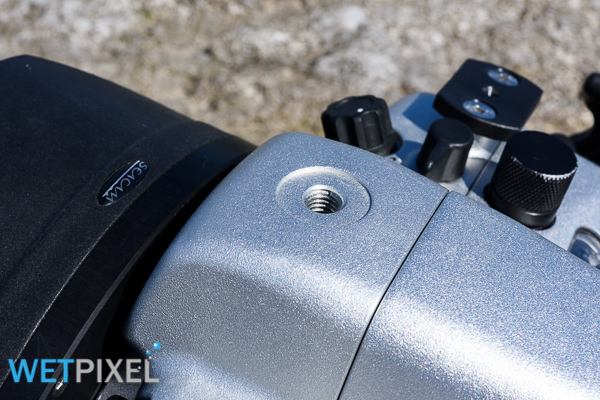
The housing features a 3/8” tripod mounting Helicoiled thread on the base and an M8 threaded attachment point on the top for attaching mounting balls, etc.
Page 1: Introduction and housing overview.
Page 2: In use review and conclusions.