Using the Channel Mixer to Correct Green Water
This month, I've prepared a short column to talk about an exciting feature in the most popular application for digital photographers – Adobe Photoshop. Just like Microsoft, Adobe has changed their naming convention, abandoning numbers and going to letters, so it's no surprise that their new product is Photoshop CS.
I'm going to use a shot that I took in San Diego recently, as it is the perfect candidate to demonstrate the use of this wonderful tool. Conditions were good for San Diego , with relatively clear water and 40 foot visibility. This cold nutrient rich water contains a lot of phytoplankton and particulate matter, which results in a lot of diffuse green reflected light, causing the water to look green in photographs.
Here is the JPEG straight out of the camera, with no color correction. The camera has already set the white balance, hue/saturation, and sharpness:
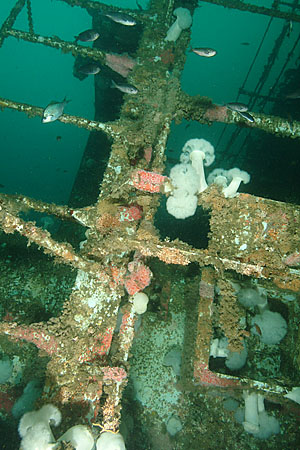
JPEG from the S2pro: Auto White Balance, STD Color
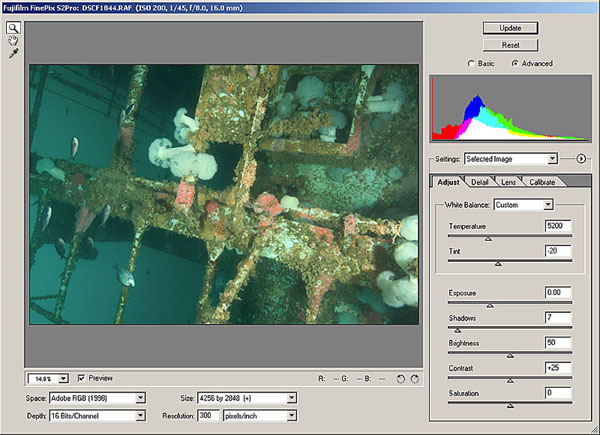
Photoshop CS RAW File Converter
Converting from RAW using the default values in the new Camera Raw converter yields a slightly better result, however the shot looks washed out:
Converted using default values from RAW to TIFF, then saved as an 8-bit JPEG
The Channel Mixer tool is something cool in Photoshop that was introduced to me by Craig Jones – a friend that has come over to digital still from shooting video. Videographers commonly use the channel mixer to adjust a whole sequence of footage as they can't use strobes like we can. Try out this new tool by opening a shot with green water. Then start a new adjustment layer by going to Layer->New Adjustment Layer and selecting “Channel Mixer.” The dialog box should look like this:
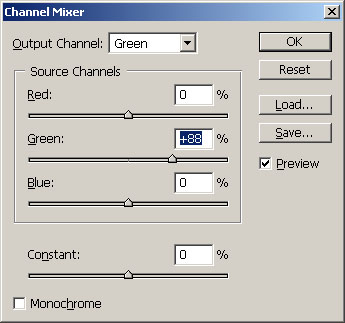
Go to the green Output Channel and pull down the amount of green in the shot. In this case, I pulled out 12% of the green to get a pleasing water color. You will actually go PAST what looks good in the foreground of the shot – it will look strange – but don't worry, you will fix that later. When you pull out green with the channel mixer you are also changing the red, yellow, cyan and blue for each pixel. You can shift these back using the Hue control.
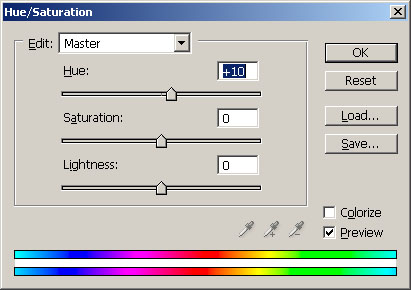
Next, add a new adjustment layer for Hue using the same command as for the channel mixer. Pull the hue up to compensate for the correction in the Channel Mixer. In this example, I have added 10 units:
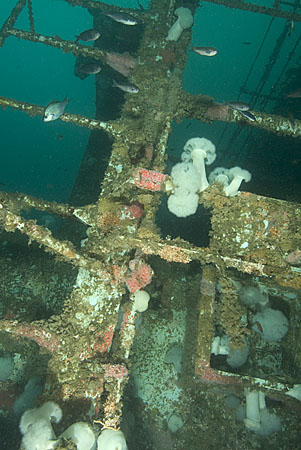
The results of the RAW converter tweaks, and the channel mixer are impressive. Much better contrast, beautiful blue water, and good saturated color:
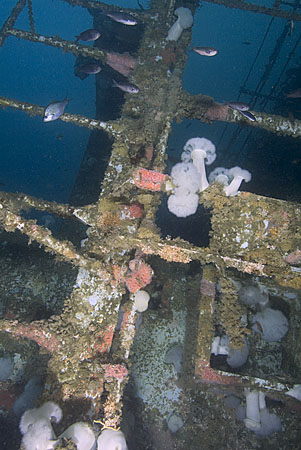
Converted to TIFF using preferred UW values, with green removed using the channel mixer and hue adjustment. Final result saved as 8-bit JPEG
This month I only touched on RAW file conversions, so I'll cover that in more depth in another column. In the meantime, if you haven't upgraded to Photoshop CS, I highly recommend it!